Display
Display blocks in Fig. 39 control what appears on the Kookaberry’s display.

Fig. 39 The palette of KookaBlockly Display blocks
Each block is described in turn below.
Kookaberry Display
The Kookaberry’s display is a 128 pixel wide x 64 pixel high cyan OLED (Organic Light Emitting Diode) display.
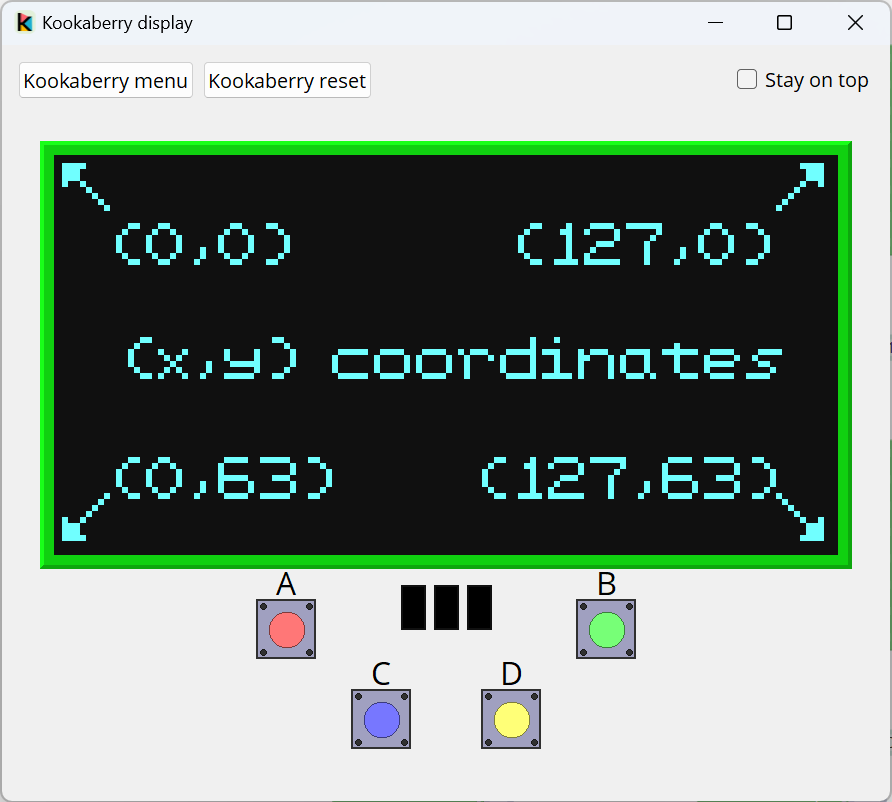
Fig. 40 The Display coordinates
The x direction is the width of the display having a range specified as 0 to 127 pixels and the y direction is the height of the display having a range specified as 0 to 63 pixels.
As shown in Fig. 40, the (x,y) location (0,0) is at the top left-hand corner of the display. The bottom right of the display has a location reference (x,y) of (127,63).
The display is driven from an internal memory array known as a Framebuffer, into which the software writes the pixel data prior to its contents being transferred to the physical Kookaberry display. This reduces any display flicker.
The method of writing to a display is generally:
Clear the Framebuffer
Write text and/or graphics to the Framebuffer in one or more parts to build up the entirety of the Display’s contents, and then
Show the display buffer on the display.
The following blocks provide the functionality to operate the Kookaberry’s Display.
Text coordinates
The coordinates at which text is positioned on the Display differs from the graphical elements (pixel, line, rectangle, and image).
Graphical elements are positioned at their top-left corner.
Text is positioned at its bottom-left corner.
To accurately position text, one can use trial-and-error, or make a calculation that depends on the text font size (the default being mono8x8).
To position a pixel at the top-left of the Display (0,0) simply specify x=``0`` and y=``0`` in the Display Pixel block.
To position text at the top-left of the Display, specify (0,7) being x=``0`` and y=``7`` (the mono8x8 font height) in the Display Print block.
Display Clear
This block clears the display’s frame buffer. The physical display will not be updated until a Display Show is used.

Display Show
This block transfers the display’s frame buffer to the Kookaberry’s physical display.

KookaBlockly automatically inserts the equivalent Display Show code towards the end of the generated MicroPython script. However it may be desirable to refresh the physical display earlier in the KookaBlockly script, such as at the end of a loop that updates the display. Use this Display Show block in such circumstances as otherwise the display will not update until the end of the script.
Display Set Font
This block sets the character font to that selected from the drop down box.
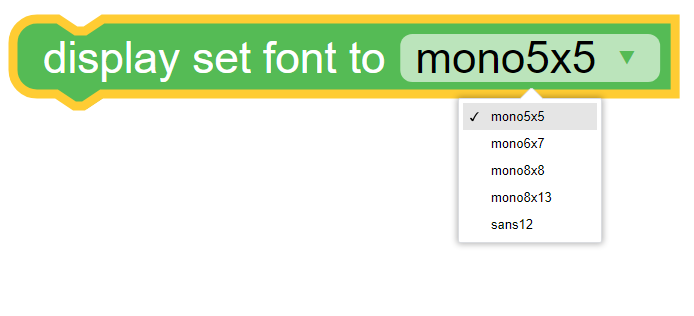
The display fonts available for selection are from smallest to largest:
mono5x5- each text character is 5 pixels wide by 5 pixels tallmono6x7,- 6 pixels wide by 7 pixels tallmono6x8- 6 pixels wide by 8 pixels tallmono8x8- 8 pixels wide by 8 pixels tall (the default font)mono8x13- 8 pixels wide by 13 pixels tall, andsans12.- 12 pixels wide by 12 pixels tall
The selected font will be applied from the point of selection.
A display using several fonts sizes may be constructed by using the Display Set Font block as the display Framebuffer is constructed by the KookaBlockly script.
Display Print
This block prints the editable text in the input value block to the Kookaberry display at position x=``0`` on a new line. The current line is set to the top of the screen immediately after the display is cleared.

If the line is longer than the display’s width, the line is wrapped onto successive lines of the display. The current display line is increased by each successive Display Print until the bottom of the display is reached.
Thereafter each successive Display Print will scroll the display upwards by one line and the current line is shown at the bottom of the display.
Display Print-and
This block displays the editable text or value in the attached input value block on the current line of the display, followed by the output of any value block.
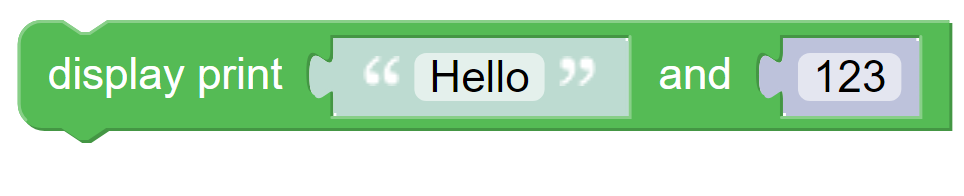
Fig. 41 shows an example to display the time:
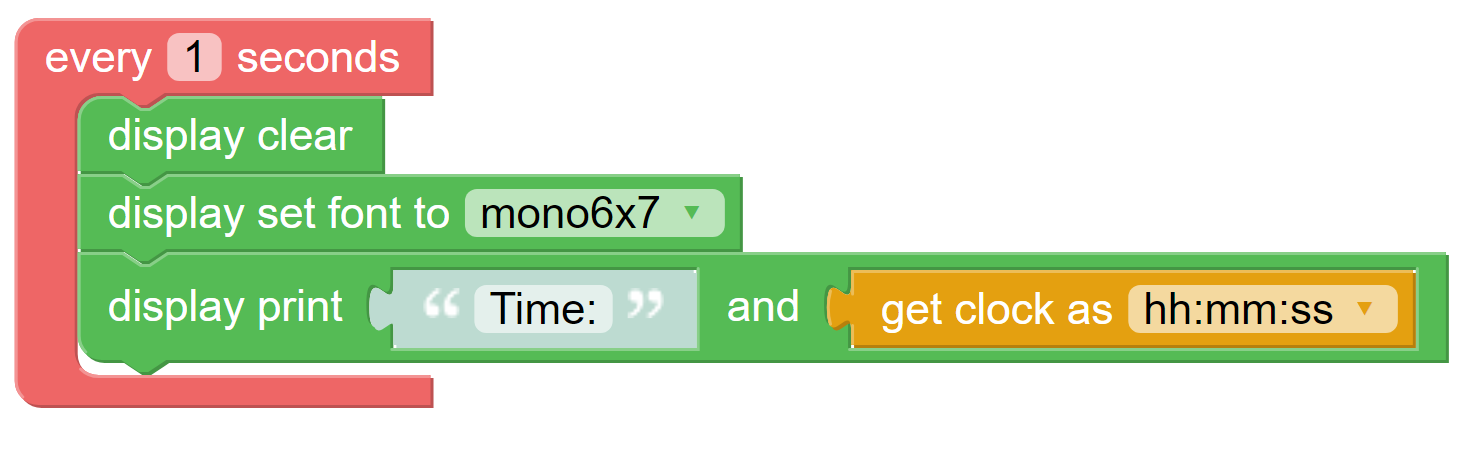
Fig. 41 Display Print-and example script
This example results in a display that looks like Fig. 42 and is updated every second.

Fig. 42 Display Print-and example display
By using “Display Clear” the displayed text stays at the top of the screen instead of scrolling down the display.
Display Pixel
This block displays a pixel at the x and y locations with the specified colour on the display. The values of x, y and colour are the outputs of any value block.
If the values of x or y are outside of the display dimensions then the pixel will not be visible.
The values for colour should be either 0 or 1, where 0 is pixel off (black) and 1 is pixel on (cyan).
Display Line
This block draws a line on the display starting from the location given by the values x1, y1 to the location given by the values x2,y2.
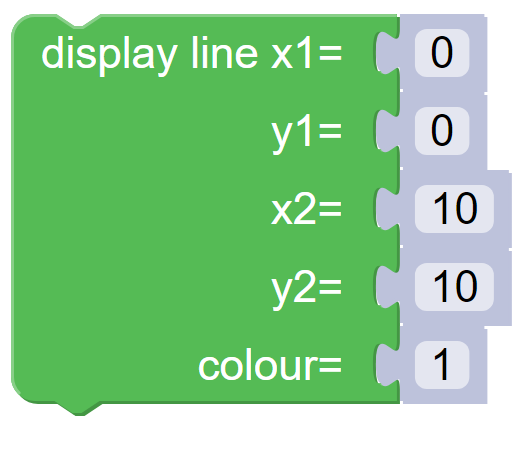
The value for colour should be either 0 or 1, where 0 is pixel off (black) and 1 is pixel on (cyan).
Display Rectangle
This block displays a rectangle starting at location given by the values x, y with a width and height given by the results of the value blocks attached to those parameters.

The value for colour should be either 0 or 1, where 0 is pixel off (black) and 1 is pixel on (cyan).
The fill? box when ticked fills the rectangle with pixels of the given colour.
The reverse? box specifies the orientation of the rectangle with respect to the x and y coordinates:
if reverse? is not ticked, x and y specify the location of the top-left of the rectangle
if reverse? is ticked, x and y specify the location of the bottom-right of the rectangle
The example script in Fig. 43 displays two rectangles of equal origin and dimensions, with one of them having the reverse? box ticked. The resulting display in Fig. 44 shows two rectangles, in normal and reverse orientations about the same x and y origin.
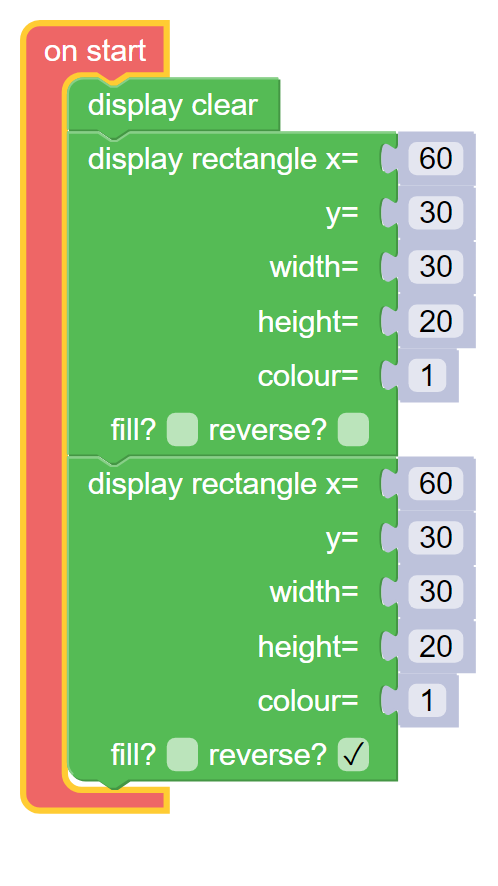
Fig. 43 Example showing the effect of the reverse? box on the Display Rectangle block
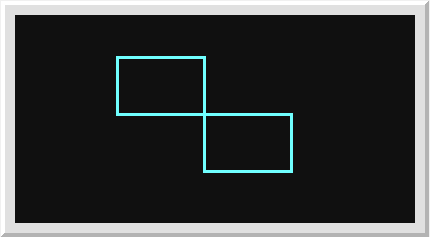
Fig. 44 The resulting display showing the effect of the reverse? box on the Display Rectangle block
Display Text
This block enables the display of the attached output of the attached value block (ie “Hello”) at the location specified by the value blocks at x and y on the display, with the colour being the value block output of 0 or 1.

Note
The (x, y) coordinate is where the bottom left corner of the display text is positioned.
Display Image
This block allows for the creation of an 8 x 8 pixel array positioned on the Kookaberry display at the coordinates of x and y.
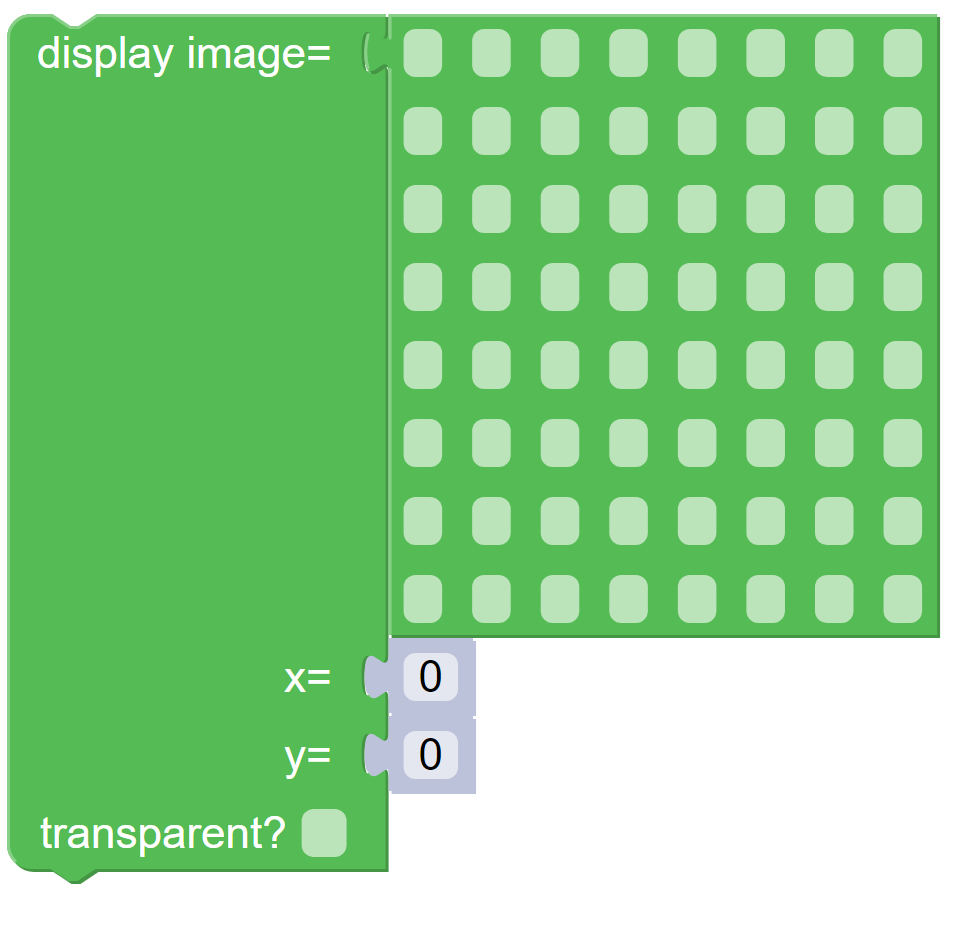
The transparent? box if ticked will not extinguish any pixels that were already on, thereby giving an impression of transparency.
By manipulating the values of x and y using value blocks, the pixel array can be made to move around the screen.
Larger pixel arrays can be created by using multiple Display Image blocks with adjacent coordinates (by incrementing x and y in multiples of 8).