Clock
Clicking on the Clock category in the KookaSuite palette reveals the available blocks, as in Fig. 36. Click and drag any of the required blocks to the KookaBlockly workspace and connect with other blocks to build a script that can use and/or set the time.

Fig. 36 The palette of KookaBlockly Clock blocks.
The blocks in the Clock category provide the functions to read and set the electronic real-time-clocks (RTCs).
The Kookaberry has an internal RTC which defaults to a time of 00:00:00 on 1 January 2015 when the Kookaberry is turned on.
The Kookaberry does not retain the time without external power as it has no internal battery to keep the internal clock running.
When the Kookaberry is connected to KookaBlockly, its internal RTC is updated to the time on the hosting computer.
An external RTC, connected as an accessory to the Kookaberry, usually has a battery and therefore maintains the time that has been previously set on it. This provides a convenient way for the Kookaberry to obtain the correct time when it is not tethered to KookaBlockly (or KookaIDE or KookaTW). The external RTC is connected to the Kookaberry using two Pins specified as SCL and SDA on the relevant blocks.
Each of the Clock blocks is described in the following sections.
Internal Clock
Get Clock – Simple Time
Reads the Kookaberry’s internal Real Time Clock (RTC) and returns a date or time in the chosen format selected from the drop-down menu on the block.

The value returned is a character string.
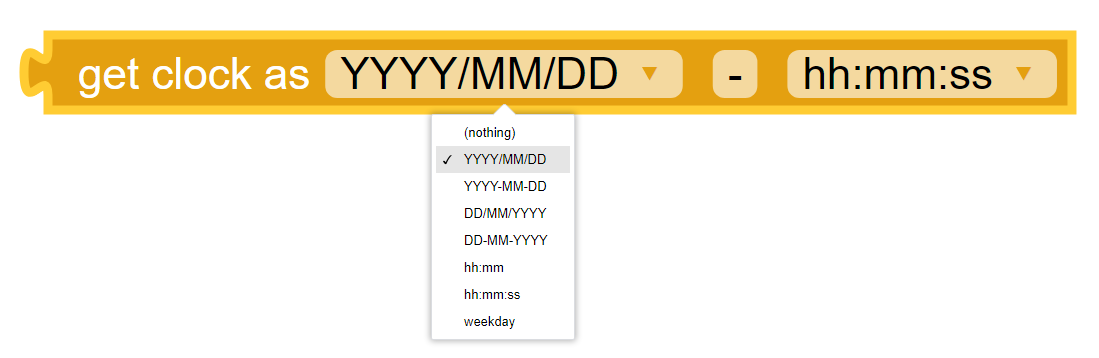
Get Clock - Extended Time
Reads the Kookaberry’s internal Real Time Clock (RTC) and returns the date and time as a character string comprising two parts
per the selected formats and separated by a string of characters that can be specified by the user (the default separator is the minus character -).
In Fig. 37 is a KookaBlockly example script demonstrating a loop which updates the Kookaberry’s display every second with the current time and date.
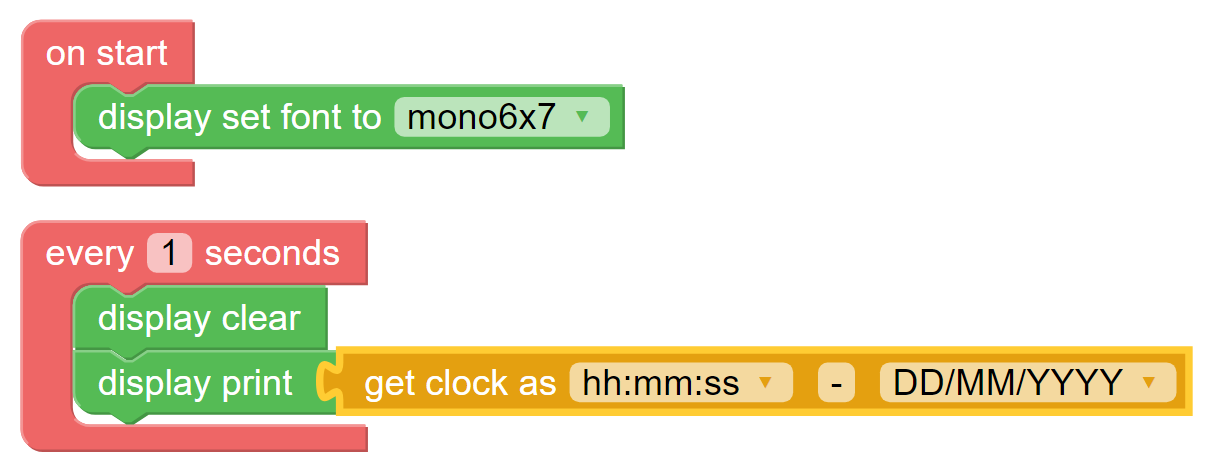
Fig. 37 A KookaBlockly Script that shows the current time and date on the Kookaberry display.
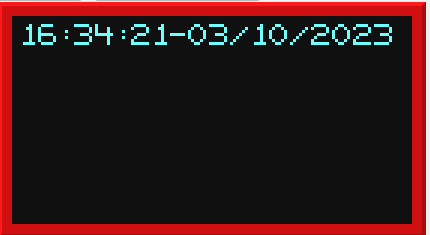
Fig. 38 The Kookaberry display resulting from the example KookaBlockly Script in Fig. 37.
Set Clock from Character String
This block sets the Kookaberry’s internal Real Time Clock (RTC) to the time specified by a character string in the format “YYYY/MM/YY HH:MM:SS”.

This is useful for updating the internal RTC with a fixed time or where the Kookaberry internal clock has not been automatically synchronised using KookaBlockly.
External Clock
External Clock’s Pins Connections
The external clock is connected to the Kookaberry by two of the five connectors on the back, P1 through to P5,
with connector P3 having two possible connection points: P3A and P3B. (see the Pins category description).
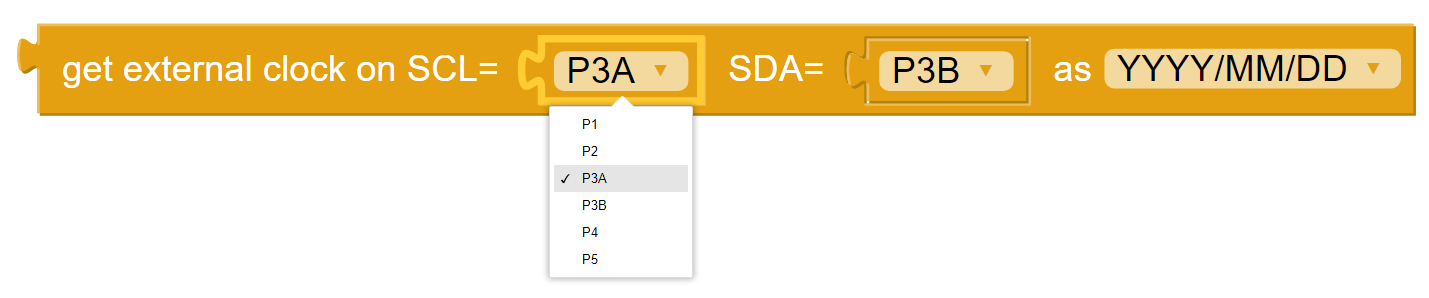
The external clock block has two input Pins drop-down selection blocks by which the input Pin can be selected.
It is possible to replace the Pins dropdown selection block with a String block. This is useful when using Pins other than those exposed on the rear of the Kookaberry, or when other microprocessor boards that are compatible with Kookaberry firmware are being used. In those cases type in the Pin’s identifier into the String block.
Get External Clock - Simple Time
Reads the Kookaberry’s external Real Time Clock (RTC) and returns a date or time in the chosen format selected from the drop-down menu on the block.
The value returned is a character string.
The external RTC is connected to the Kookaberry’s connector ports as selected from the SCL and SDA dropdown lists.
The default setting of SCL as P3A and SDA as P3B is usually correct, meaning the external RTC is connected to the Kookaberry using the 4-pin P3 port.
Get External Clock – Extended Time
Reads the Kookaberry’s external Real Time Clock (RTC) and returns the date and time as a character string comprising two parts
per the selected formats and separated by a string of characters that can be specified by the user (the default separator is the minus character -).

The external RTC is connected to the Kookaberry’s connector ports as selected from the SCL and SDA dropdown lists.
The default setting of SCL as P3A and SDA as P3B is usually correct, meaning the external RTC is connected to the Kookaberry using the 4-pin P3 port.
Set Internal Clock from External Clock
Sets the Kookaberry’s internal Real Time Clock (RTC) by copying the current time from the external RTC.
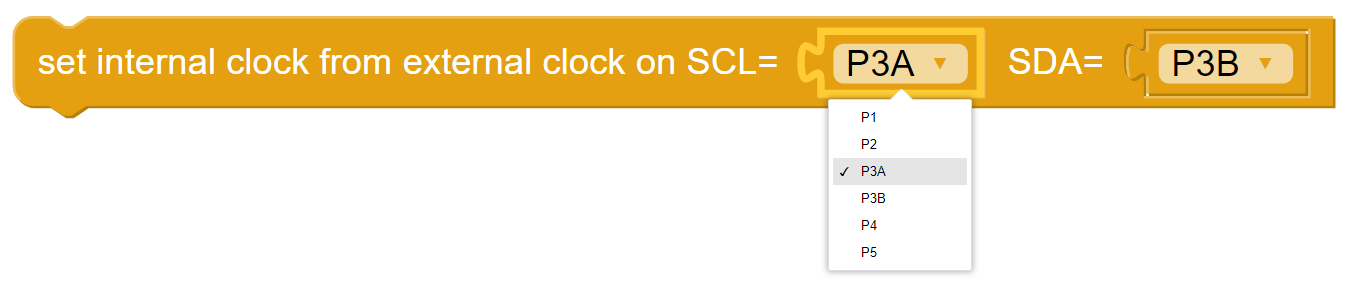
The external RTC is connected to the Kookaberry’s connector ports as selected from the SCL and SDA dropdown lists.
The default setting of SCL as P3A and SDA as P3B is usually correct, meaning the external RTC is connected to the Kookaberry using the 4-pin P3 port.
Set External Clock from Internal Clock
Sets the Kookaberry’s external Real Time Clock (RTC) by copying the current time from the internal RTC.

This is useful for updating the external RTC with the correct time when the Kookaberry is tethered to KookaBlockly.
The external RTC is connected to the Kookaberry’s connector ports as selected from the SCL and SDA dropdown lists.
The default setting of SCL as P3A and SDA as P3B is usually correct, meaning the external RTC is connected to the Kookaberry using the 4-pin P3 port.
Set External Clock from Character String
Sets the Kookaberry’s external Real Time Clock (RTC) to the time specified by a character string in the format “YYYY/MM/YY HH:MM:SS”.

This is useful for updating the external RTC with a fixed time or where the Kookaberry’s internal clock has not been automatically synchronised using KookaBlockly.
The external RTC is connected to the Kookaberry’s connector ports as selected from the SCL and SDA dropdown lists.
The default setting of SCL as P3A and SDA as P3B is usually correct, meaning the external RTC is connected to the Kookaberry using the 4-pin P3 port.